
In our previous article „Why Defrosting Your Refrigerator is Essential“ we explained in detail why regular defrosting is crucial for prolonging the lifespan and ensuring the energy efficiency of your appliance.
Now, we move on to the practical part and will guide you on how to properly defrost refrigerators of different types, especially considering the popularity of No Frost systems and bottom freezer models in the U.S. market. Incorrect defrosting can damage your appliance, so it’s important to follow the right instructions.
Section 1
Identifying Your Refrigerator’s Defrost System
Before starting the defrosting process, it is essential to know which type of system your refrigerator has. In the U.S., the most common types are:
- Manual Defrost:
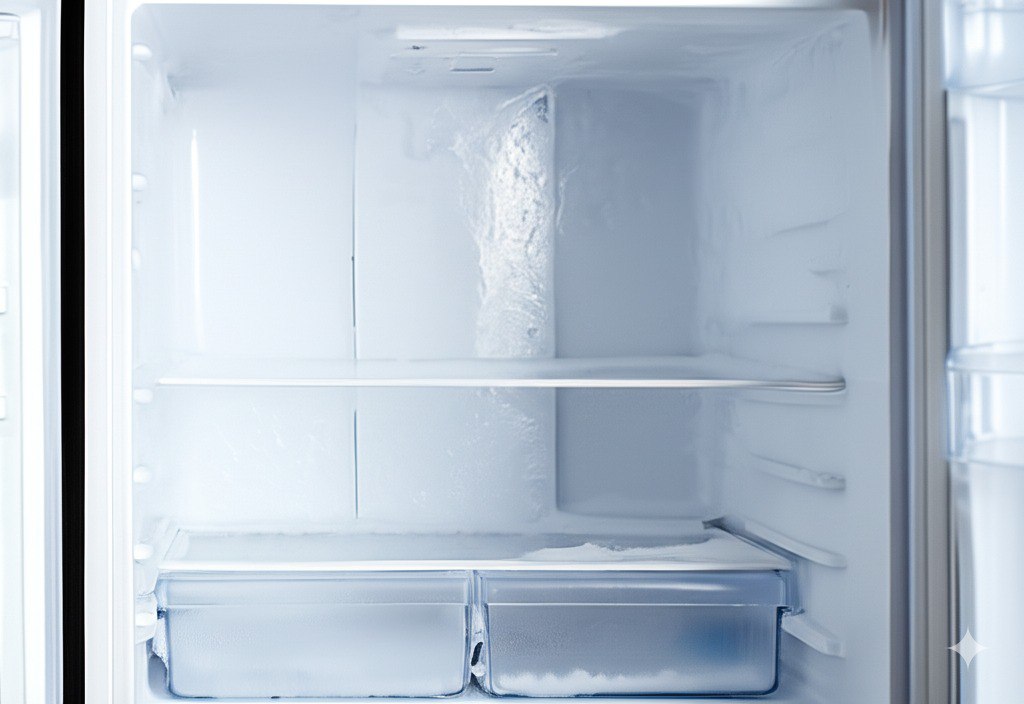
This older type accumulates frost on the freezer walls, requiring manual intervention for removal. If you regularly see ice buildup, your refrigerator likely has this system. - Automatic Defrost (Frost-Free/No Frost):
Highly popular in the U.S., this system automatically prevents ice buildup. No Frost refrigerators can have either a top or bottom freezer. - Cycle Defrost (Frost-Free with Cycle Defrost):
Less common in modern American models, this system periodically melts frost from the rear wall and directs the water into a special drainage pan.
You can find information about the defrost system:
- Owner’s Manual: The most reliable source of information.
- Sticker inside the refrigerator: Often placed inside the fridge compartment or on the back panel.
- Manufacturer’s website: Search for your model’s specifications.
- External signs: Visible ice buildup indicates manual defrosting, while the absence of thick ice layers usually suggests a No Frost system.
Section 2
How to Defrost a Manual Defrost Refrigerator
If your refrigerator has a manual defrost system, follow these steps:
Step 1: Preparation
- Unplug the refrigerator. Always remove the power cord from the outlet!
- Take out all food items from the fridge and freezer compartments. Place them in a cooler bag with ice packs or in a cool location.
- Remove all shelves and drawers from the freezer compartment.
Step 2: Defrosting Process
- Leave the freezer door open.
- Place a container to collect melted water under the freezer compartment (or inside if there’s a drainage hole). Use towels to protect the floor from water spills.
What NOT to Do:
- Never use sharp objects (knives, screwdrivers) to remove ice! This may damage the evaporator and cause refrigerant leaks.
- Do not attempt to forcefully break off ice chunks.
Step 3: Removing Melted Ice and Water
- Regularly drain the collected water.
- Manually remove melted ice pieces.
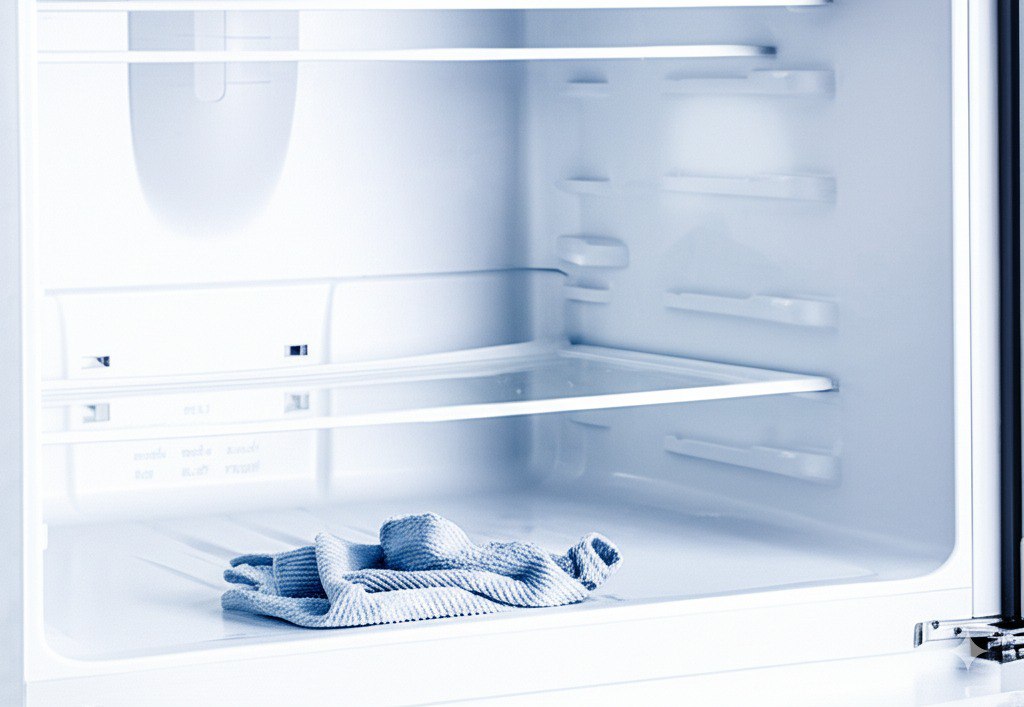
- Thoroughly wipe all interior surfaces of the freezer with a dry cloth.
Step 4: Cleaning (Recommended)
- Clean the interior surfaces of the refrigerator and freezer with warm soapy water.
- Pay special attention to the door seals.
- Wipe everything dry.
Step 5: Final Steps
- Reinstall shelves and drawers.
- Close the refrigerator door and plug it back in.
- Wait for it to reach the proper temperature (usually 2-3 hours) before placing food back inside.
Section 3
Defrosting No Frost Refrigerators in the U.S.
No Frost refrigerators are highly popular in the U.S. and are designed to automatically prevent significant ice buildup in the freezer compartment. Generally, manual defrosting is not required.
However, over time, even these models can accumulate some frost or ice due to a loosely closed door, excessive humidity, or malfunctions in the automatic defrost system.
What to Do if You Notice Ice in Your No Frost Refrigerator:
- Check the door seals:
Ensure they are tightly sealed along the entire perimeter and do not allow warm air to enter. - Avoid overloading the fridge:
Too many food items can obstruct air circulation, leading to ice buildup. - Try “resetting” your fridge:
Unplug it for a few hours (e.g., overnight). This can help the auto-defrost system reset itself. - Deep Clean (annually or as needed):
Even if there is no visible ice, a full defrosting and cleaning process is recommended at least once a year:- Unplug the refrigerator.
- Remove all food items.
- Leave the doors open for several hours (usually 4-6 hours or overnight) to allow any remaining frost to melt.
- Thoroughly clean and dry all interior surfaces.
- Plug the refrigerator back in.
Important!
Never attempt to mechanically remove ice from a No Frost refrigerator, as this may damage sensors and other components of the automatic defrost system.
Section 4
Defrosting Bottom Freezer Refrigerators
Bottom freezer refrigerators are very common in the U.S. The defrosting process depends on the type of defrost system:
- For manual defrost models: Follow the steps in Section 2.
- For No Frost models: Follow the recommendations in Section 3.
Generally, there are no significant differences in the defrosting process between bottom freezer and top freezer models. The key factor is identifying the defrost system.
Section 5
General Tips for Safe and Efficient Defrosting
- Choose the right time: Defrost when you have a minimal amount of perishable food.
- Protect the floor: Place towels or paper underneath the refrigerator to absorb any water leaks.
- Avoid unsafe defrosting methods: Do not use a hairdryer or heater to speed up the process.
- Ensure all compartments are dry before turning the refrigerator back on: This prevents new ice buildup and unpleasant odors.
- Regularly clean the drainage hole (if applicable): This helps prevent clogs and water accumulation.
Conclusion
Proper defrosting is an essential part of refrigerator maintenance. By following these instructions, you can effectively defrost any type of refrigerator commonly used in the U.S., whether it’s a traditional manual defrost model or a modern No Frost refrigerator with a bottom freezer. Regular defrosting helps extend your appliance’s lifespan, save energy, and ensure optimal food storage conditions.
If you encounter difficulties with defrosting or your refrigerator requires professional maintenance or repairs, contact qualified specialists at Omega Tech Service.
 4.7 Rating